How to Keep the Film Mask While Reframing Your Negatives
Updated April 2nd, 2025Blending the efficiency of digital editing with the charm of analog.
While browsing the social media accounts of your favourite analog photographers, you may have noticed that some of their images feature the film mask that displays details like the film stock and frame number.
I'm not here to debate whether or not to include the frame around your images; to each his own. Last year, I decided to try it for myself. I kept a small portion of the film mask around my 35mm negatives. I believe it creates an organic yet discreet border, enhancing the contrast against the white background I use on Instagram to maintain the 3:2 aspect ratio of 35mm images.
Regarding medium format, I follow a similar process and scan the entire mask around negatives captured with my Yashica-Mat 6x6. This format used to work particularly well with Instagram's square format until they changed the profile grid to a 3:4 ratio earlier this year. I also chose to incorporate a slight film mask on this website. This distinction helps differentiate the work displayed on digital platforms (such as Instagram and my website) from my print work, where the mask would be removed as it typically is for standard prints.
If you're reading this, chances are you might want to feature some sort of mask around your negatives. However, this presents a challenge: when you want to reframe a shot or straighten the horizon, you'll lose portions of that mask. I've always struggled with keeping my images straight. Even though I've improved over time, I still struggle to keep the horizon balanced when shooting with the Yashica-Mat 6x6 and its non-mirrored viewfinder. This is why I developed this particular workflow.
After this lengthy introduction, let's dive in!
Note: This workflow is applicable only if you scan your negatives at home and can control how much of the mask is captured. I use a mirrorless scanning setup and the Essential Film Holder.
I - Basic Edit In Lightroom Classic
I use Negative Lab Pro to convert all my negatives. This plugin for Lightroom Classic works exceptionally well and was created by an independent developer and talented film photographer. However, you're welcome to use a different conversion software; it won't affect the overall process. Once I convert the negative, I ensure that the entire desired film border is visible. For 6x6 negatives, I use the 1x1 crop ratio in Lightroom to keep the process straightforward. I then proceed with the editing, starting with the plugin sliders and then applying additional masks.
Edit the image as you see fit, and make sure you are satisfied with the edit before moving on to the next step. While you will still be able to make slight adjustments later, at that point, you will have a TIFF or PSD file that contains less information than the original RAW or DNG file.
II - Send to Photoshop
Step 1: Sending the Image to Photoshop
The first step is to send the image to Photoshop (or any other software that supports layer editing). Right-click on the image and choose "Edit in Photoshop." I set mine to a PSD file in 300DPI and select "Edit a Copy with Lightroom Adjustments." This creates a second file in either TIFF or PSD format, allowing for a roundtrip between Lightroom Classic and Photoshop. Once you finish editing in Photoshop, Lightroom Classic will automatically import the image and place it in the same folder as the original.
Step 2: Selecting the Image
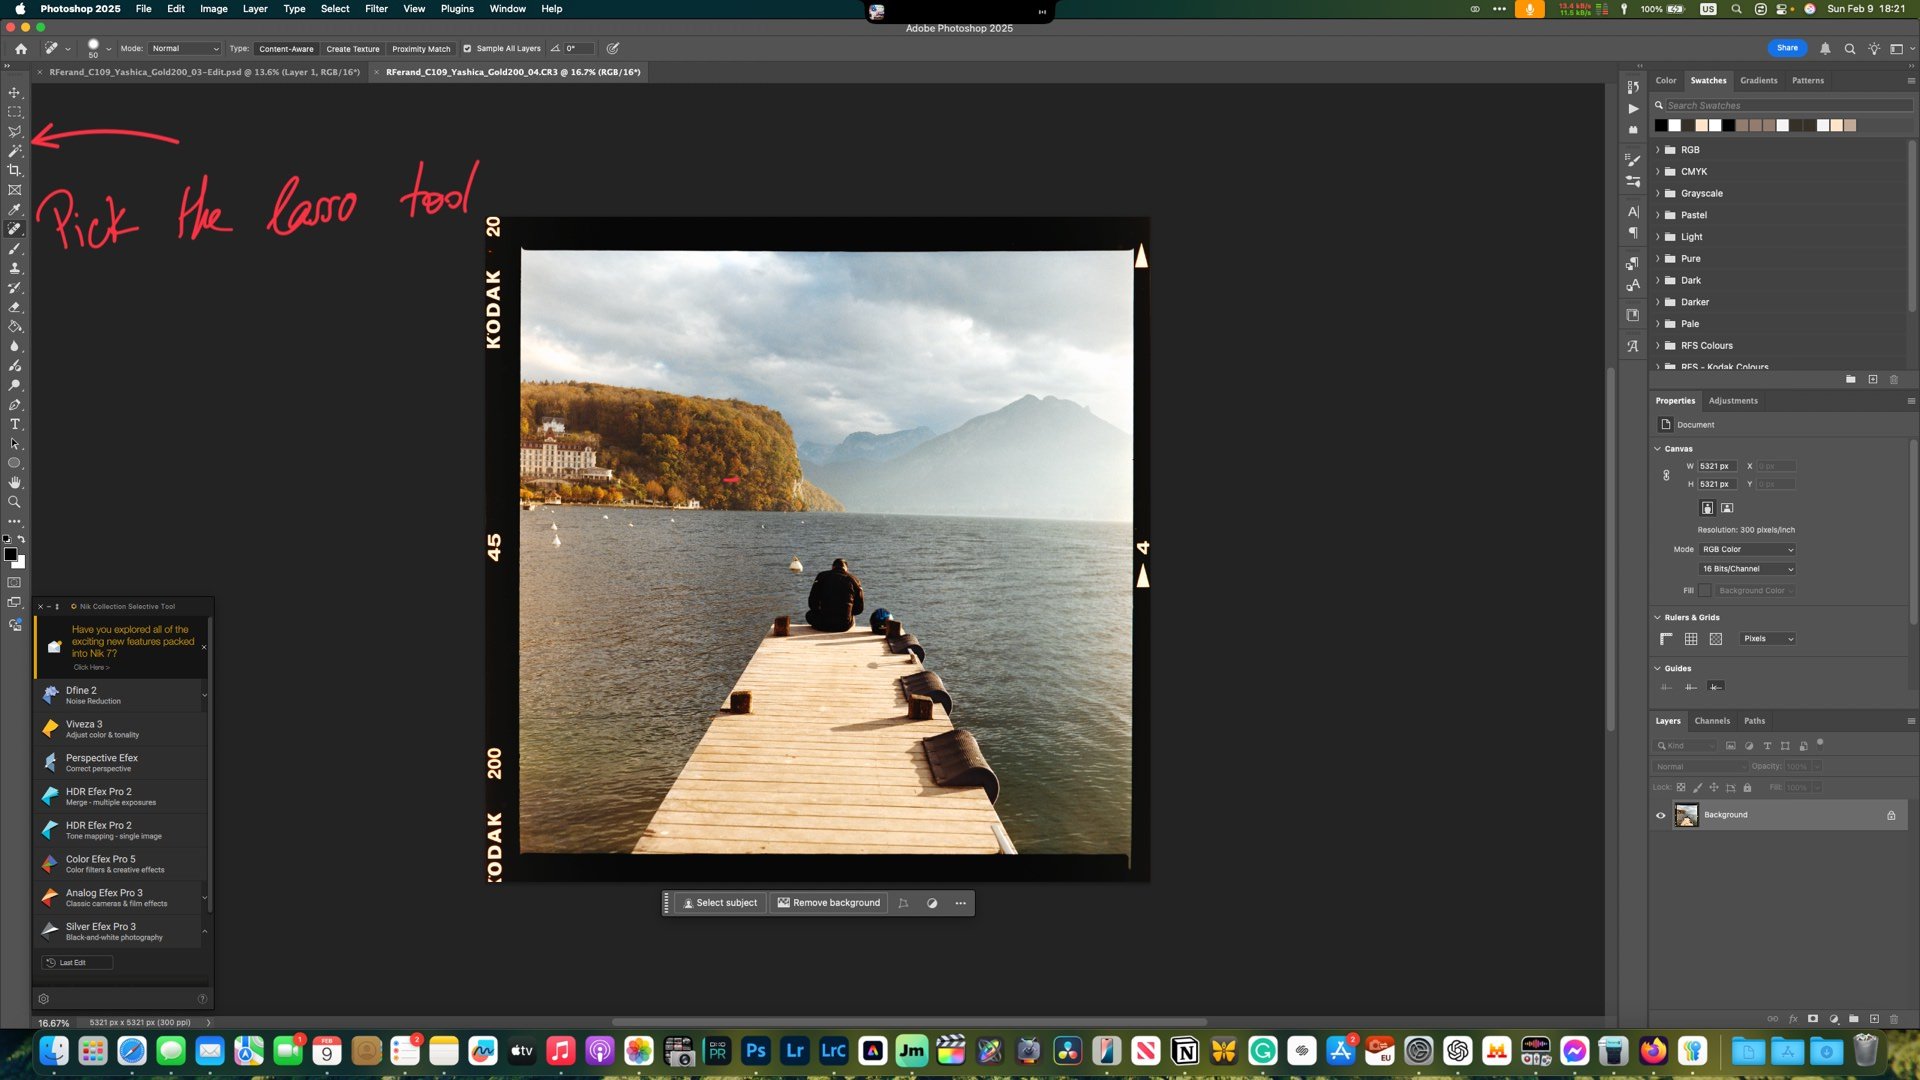
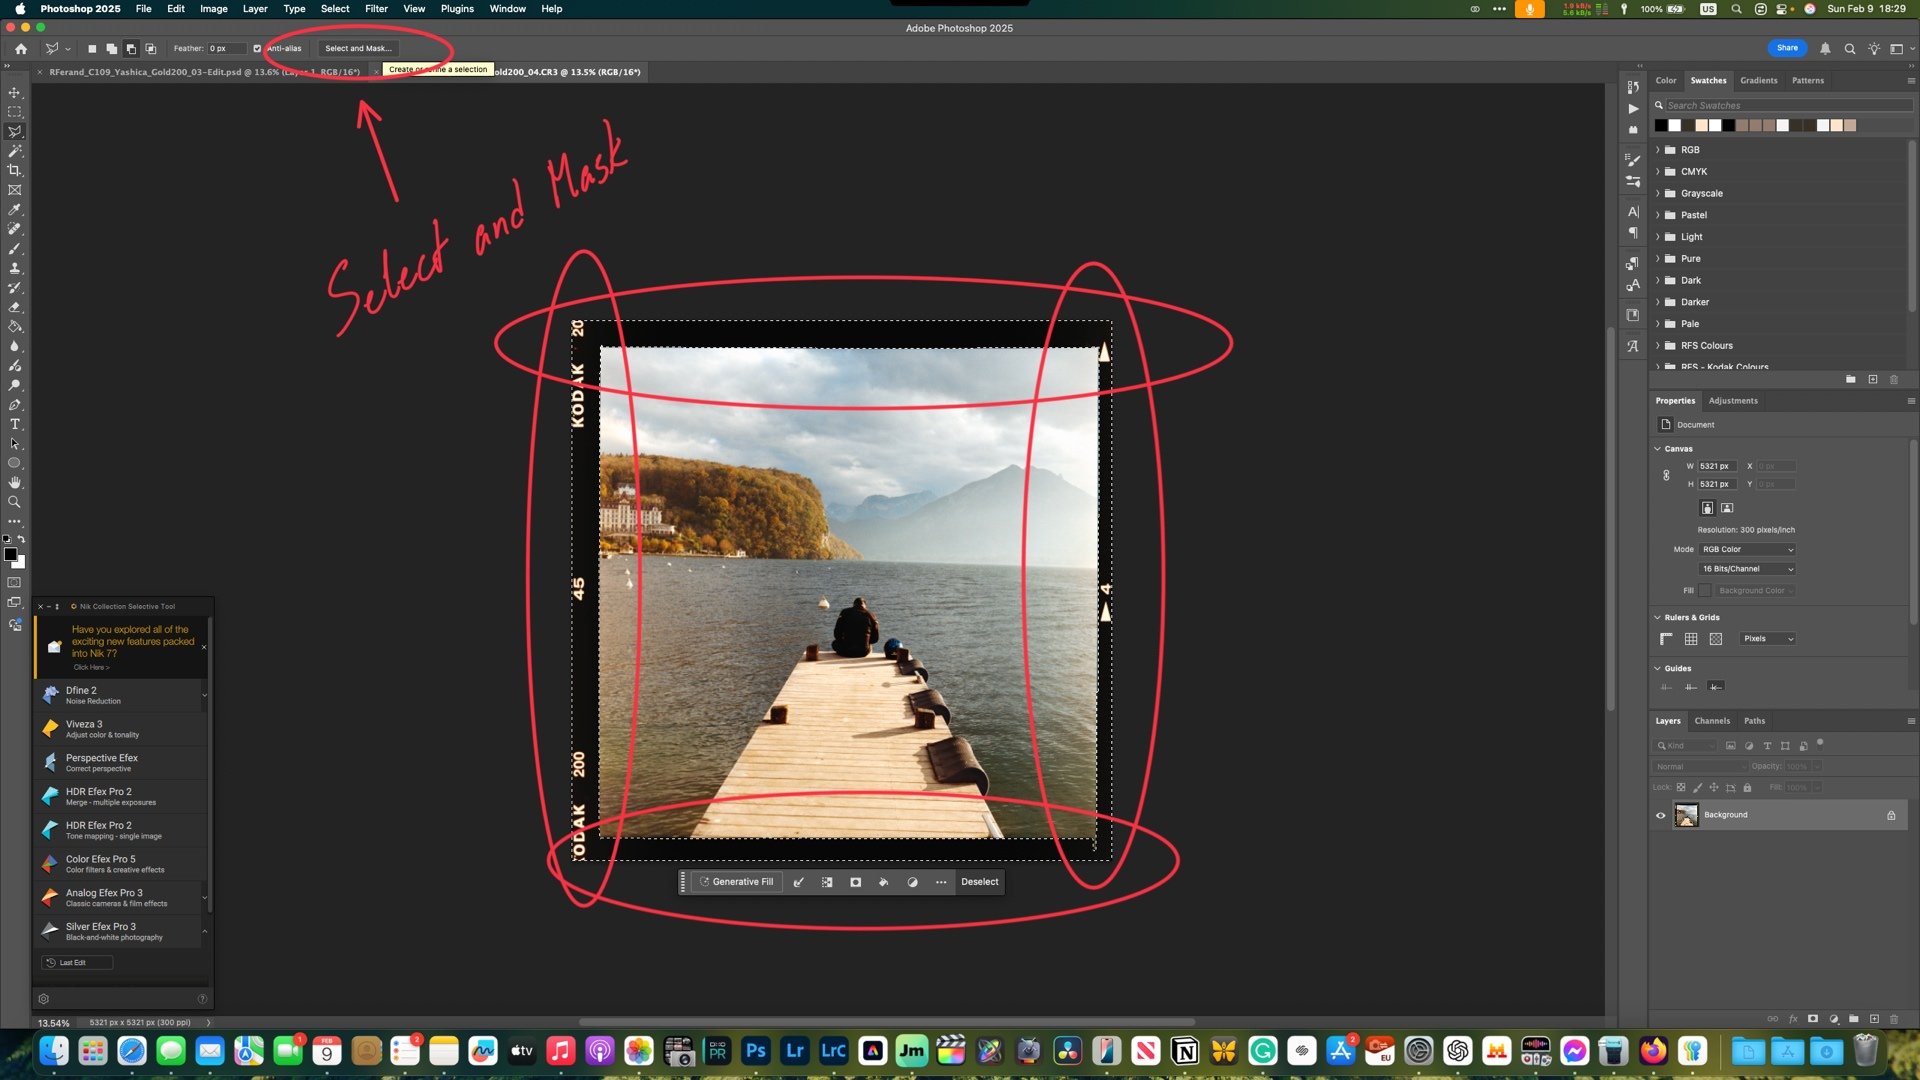
Once in Photoshop, use the Polygonal Lasso Tool to select the image. Depending on the type of images—medium format or 35mm—I switch between the Polygonal Lasso and the Magnetic Lasso Tools to make my selections. I aim to be as precise as possible to capture the small imperfections of the mask, which adds to the organic feel of the final look. However, I also strive to balance efficiency and results so I don't spend countless hours on this step. Finally, you can also try using the magic wand to select the mask. Although the results can be really random, sometimes they work well.
Step 3: Inverting the Selection
After making your selection, press Shift + Command + I (on Mac) or Shift + Control + I (on Windows) to invert the selection. Then, go to the top menu and choose "Select and Mask..."
Step 4: Refining the Selection
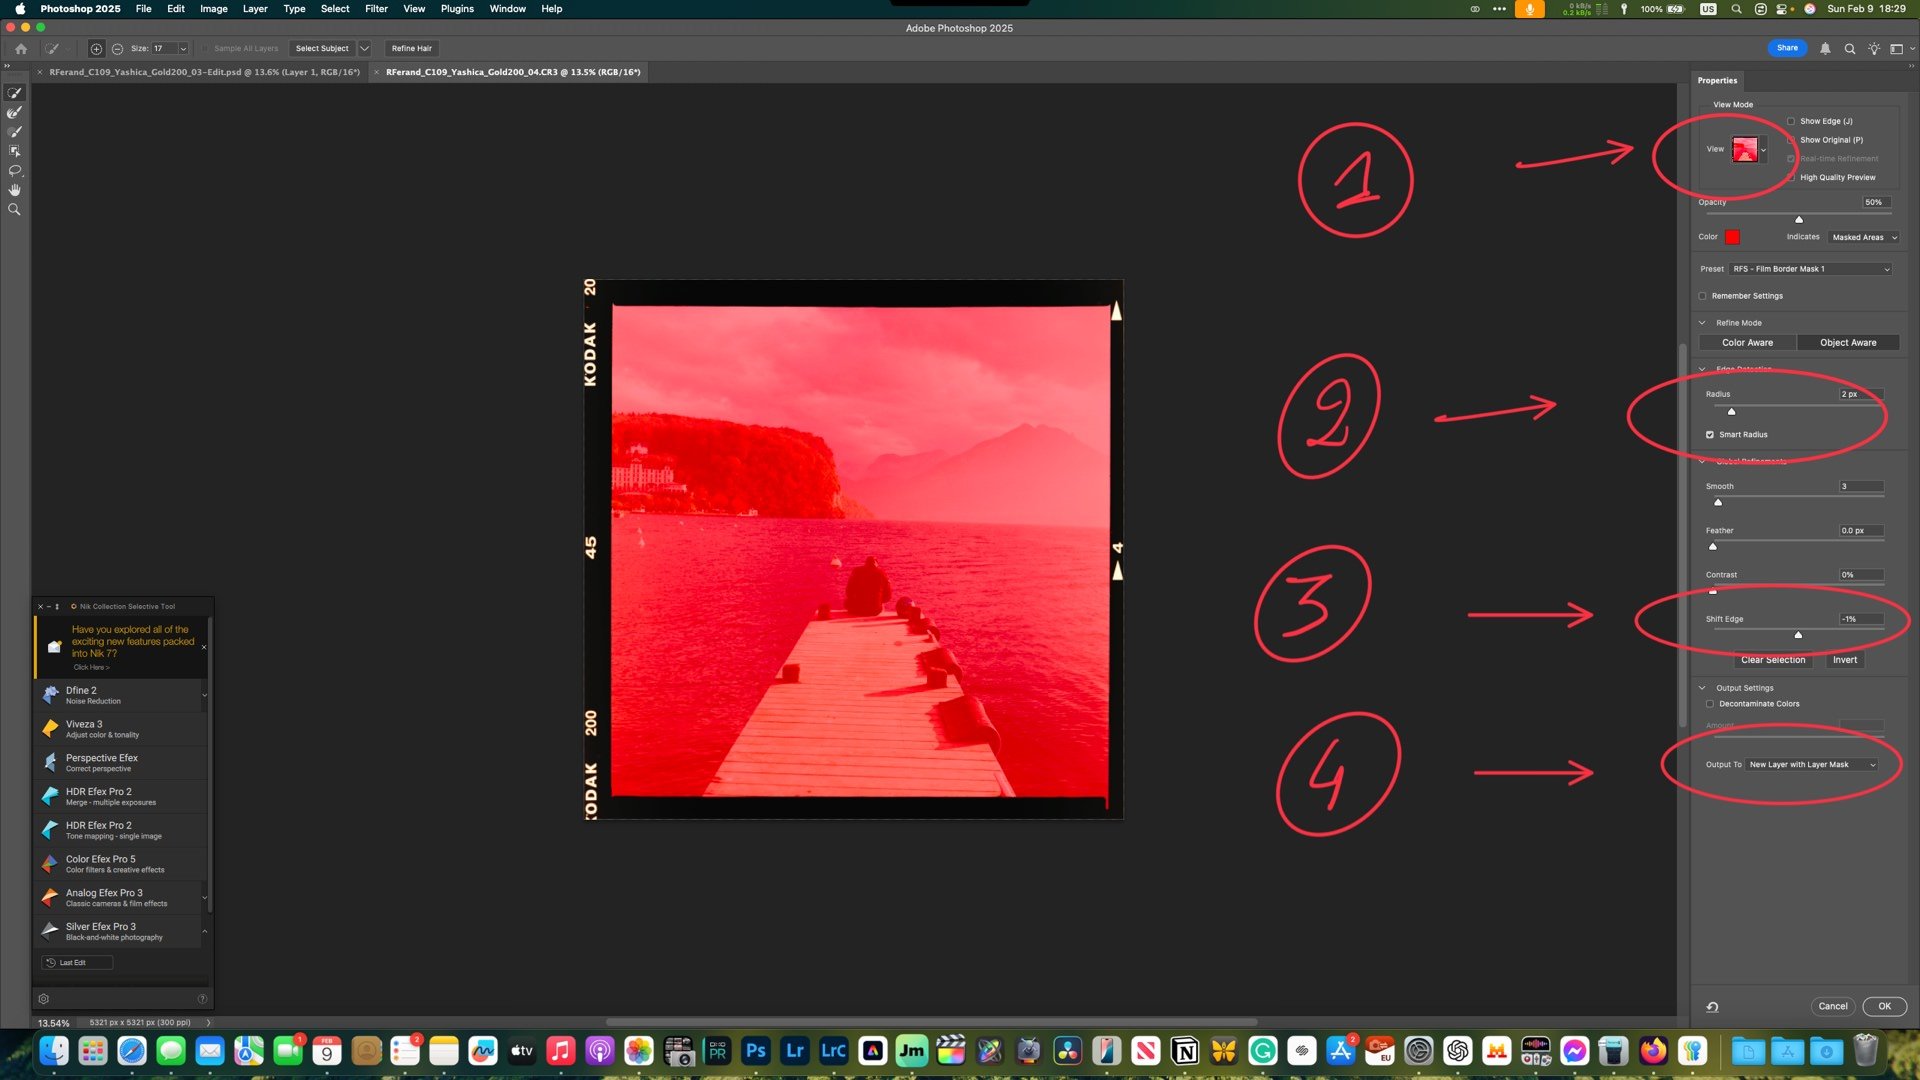
Photoshop will open a secondary window to refine your selection. I prefer the Color view mode to better visualize my selection (everything the red light touches does not belong to your selection). You can refine your selection using the Smart Radius and Shift Edge options.
Tip: Create a selection preset to expedite the selection refinement next time. For example, I have different presets for 35mm and 6x6 Medium Format negatives.
Once you have refined your selection, click OK and then choose “New Layer with Layer Mask “ under Output Settings.
Step 5: Adjusting the Mask
Now you're back in the main Photoshop window, but wait a second—the image is gone! Only the mask shows! No worries; it's all part of the process. Find the adjustment panels and add a Curves and Saturation adjustment to your mask. This extra step can be beneficial, allowing you to control the look of the mask independently. If you've heavily modified the contrast of the negative in Lightroom (such as by lifting the blacks), these adjustments will help enhance the mask’s visibility. Typically, I create an S-curve with heavy shadows for contrast. For Saturation, I usually increase it to bring out the film stock details (name and frame number).
To ensure that the Curves and Saturation adjustments only affect the mask, select both adjustments. While pressing ALT, hover over the line between the adjustment and film mask layers. A small arrow will appear; click to anchor the adjustment to the layer.
Step 5.1 Blending the Film Border Mask (Optional):
When selecting the film border, you might find the mask edges to be too sharp and unnatural. If this happens, simply duplicate the mask layer and then convert it to a Smart Object. Then, go to filter-blur and add a Gaussian blur. Anything between 2.5% and 5% is good.
Step 6: Reframing the Image
With the optional mask adjustments completed, we can now focus on reframing the image—after all, that's the purpose of this process! At this point, the film mask layer should be named "Background Copy," and below it, the "Background" layer appears locked and hidden. Simply unlock it and make it visible (notice the eye icon next to the layer? Click in the empty box beside "Background." Voilà! The image will now appear.
Step 7: Final Adjustments
Select the background layer and press Command + T (on Mac) or Control + T (on Windows). Make sure the aspect ratio is locked—this is likely the default setting. You can now rotate the image to correct the horizon and extend it to cover any empty areas, ensuring the mask on the background layer does not show underneath the film mask layer. This may require cropping the image like you do in Lightroom Classic.
Alternatively, you may use Photoshop's AI Generative Fill tool. However, you are free to decide whether to apply these tools to your analog work (No Judgment here). I typically opt to crop instead.
If you're happy with the result, click “Save” (not “Save As”) or use the shortcut Command + S (on Mac) or Control + S (on Windows). The image will be automatically imported back into Lightroom and should appear stacked with the original.
III- Final Edit in Lightroom Classic
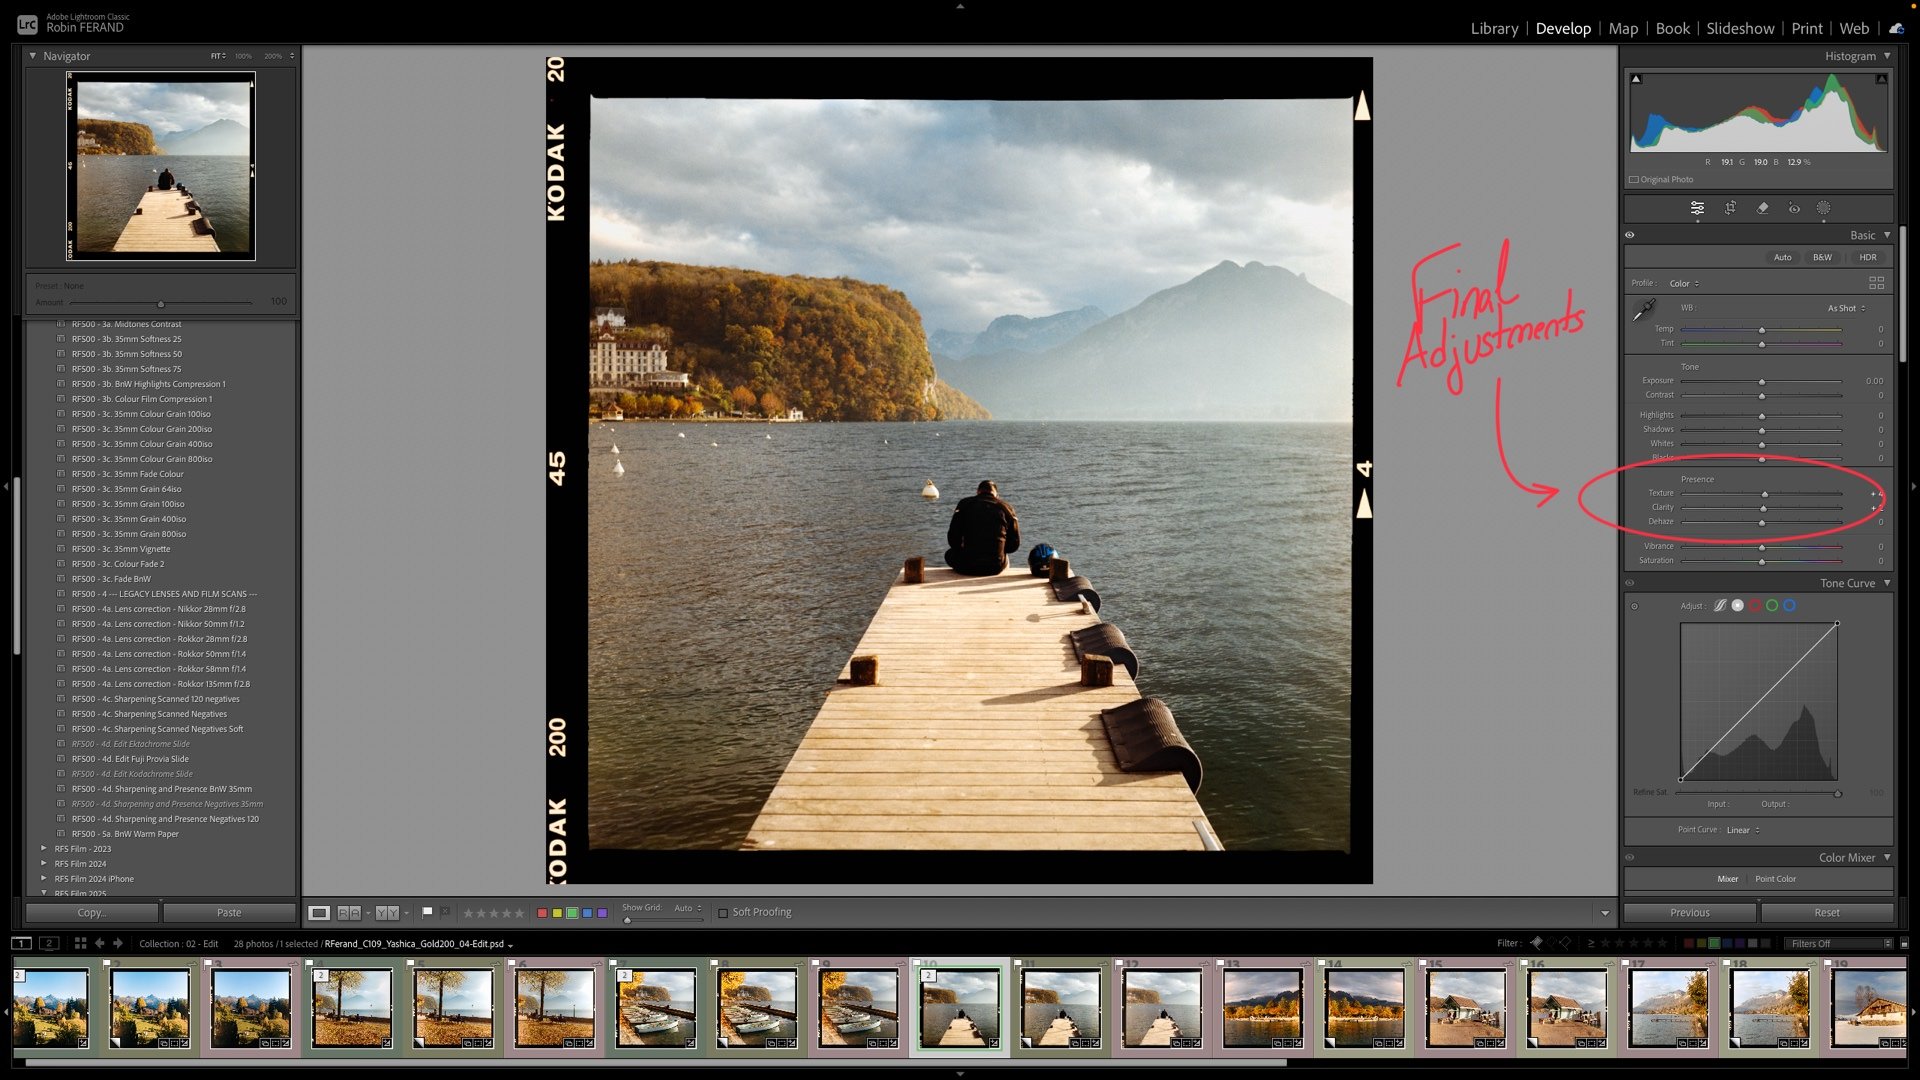
We're almost finished. You can choose to make further edits at this stage, but this time, we will use Lightroom sliders instead of Negative Lab Pro since the image we are working with is a copy of an already converted image. Once I complete the editing and add metadata to all my images, I will create another collection with virtual copies. In this collection, I will reframe each image without the film mask for publishing and printing.
IV - Final Thoughts
Using this method, you can retain the film mask while enjoying the freedom to reframe your negatives. I'm sure there are other ways to select the mask more quickly in Photoshop. Still, in my experience, the magnetic and polygonal lasso tools yield the most accurate results, especially with monochrome images. I hope you find this helpful. If you have any questions or want to leave a comment, please email me or write to me below.
DISCOVER EVERYTHING I USE TO DEVELOP AND SCAN MY FILM NEGATIVES
Disclaimer: when you purchase an item through these links, I might earn a small commission which helps supporting my work and keeping this website ad-free.
Thank you!


